
Every morning I wake up, roll back and forth like a roly-poly, and ensure that I am alive again. I wipe the sleep from my eyes and drag myself to the bathroom sink. I stare at myself, not terribly excited or disappointed that I still look how I look but filled with a purpose to complete one task if any: to make myself look like I just walked out of an editorial shoot, whatever that means that day. Sometimes it means eyeshadow that reaches up to dry, tumbleweeds like edges or bare skin with an incredibly structured and complicated hairstyle that definitely took too long to do. My main goal in life is to constantly look like I’m on my way to a shoot and I know I’m not alone in that dream. Regardless of your editorial (or non-editorial) goals for the day, here are some very doable editorial-esque hair looks that can be achieved at home without four hours worth of effort.
Margot Robbie’s full bangs and textured, piecey waves can be easily recreated on day two (straight) hair– bangs optional. Wake up, wipe the crust out of your eyes and brush through your hair. Spray a texturing spray like the Oribe Dry Texturing spray throughout your hair. Flip your head over and shake the hair out a bit. Grab your favorite hot tool, take medium size sections of hair, and create loose waves by wrapping your hair around the tool. Flip your head back over and shake hair out again; scrunching, rubbing and massaging your roots with your fingertips to the desired messy look. After adjusting to the blood rushing to your head at once, rejoice! You’re ready for the day.
To achieve this very cool and breezy protective style, start on clean, stretched hair and begin creating sections in the hair. Place your parts however you choose and begin twisting those sections as you would for a chunky twist-out. Be sure to thoroughly moisturize the hair while you are twisting your sections. I like to use the Camille Rose Twisting Butter or straight-up shea butter along with avocado oil. To create the knots, grab your twists and wrap it around itself and secure with a bobby pin or rubber band. If you would like to have large Bantu knots like Zazie, you can always add braiding hair to each section to extend the length and thickness of the knot.
As mentioned before, these looks should be as uncomplicated and self-explanatory as possible rendering myself useless in these descriptions. Regardless, I’m going to explain how you can get this romantic bun in time for your morning commute.
Start by parting the front of your hair to your preference. I’m a fan of a middle part for looks such as this, so let’s pretend that’s relevant information. After you’ve placed your part, section out face-framing pieces to your liking and clip them out of the way. Gather the rest of your hair into a low (loose) pony and twist the hair, wrapping it around the base of the pony. Secure with a bobby pin or another elastic. Take those pieces in the front and use a flat iron to create waves. Tug at the roots at the front of your head for added volume and va va voom. Pull a few strands for romantic jaw-grazing tendrils and set with hair spray. Now you’re ready for a meet-cute in the middle of rush-hour traffic.
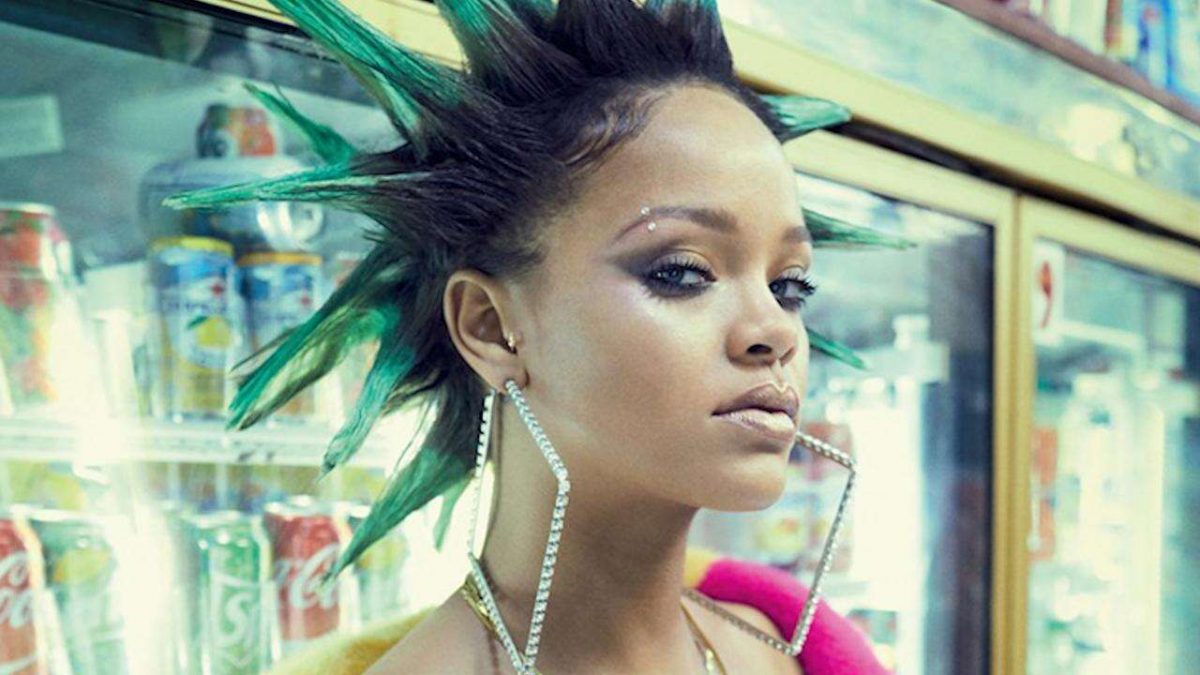
Much like Margot’s textured waves, this piecey look starts and progresses in a very similar way. Herein lies the difference, instead of wrapping your hair around a curling tool, straighten it to bone straight for a choppy look and section the top half into a bun. Be sure to rough up the bottom half with your fingertips for extra cool factor or casually dangle an unlit cigarette from your lips– either will work.
Now we arrive at possibly the simplest style out of the bunch. Depending on your hair texture, you may be able to wake up and already have this style down; however, there are some steps to help refine the look. Our curly and kinky girls may be best suited for this hairstyle given the inherent volume in having textured hair.
Detangle hair and brush out any knots and tangles until smooth. Divide hair into sections and blow-dry hair until more stretched but not straight. I like using the Revlon One-Step Hair Dryer for faster blow-dry time. Fluff and pick hair to the desired shape, spray on an anti-humidity spray like the Oribe Imperméable Anti-Humidity Spray and go on about your day you Zendaya/Diana Ross look-alike.
This look starts with a trip down to your local beauty supply store. Not Sally’s, not Ulta, nor some small beauty boutique that also sells Voluspa candles. Take yourself down to a shop where posters of black women with curly weaves and Silk Elements relaxers wallpaper the windows and barred door. Inside, locate the Xpressions kanekelon hair and pick your color of choice; pay (we don’t condone stealing) and make your merry way home and into your bathroom to begin this fly look.
Brush hair up into a tight, smooth bun. Be sure to make the bun as small as possible so that it is easier to disguise when adding hair. Take the hair out of the package and tug on the ends for a tapered, more natural look. Hold the hair in the middle, grab a large elastic and tie it around the hair in a way that a loop is left with the rest of the hair secured by an elastic. If that was as confusing to read as it was to explain, you can watch a video here for the visual.
Attach the synthetic hair to your bun using the elastic making sure to completely cover your hair. Take a section of hair from your new ponytail and wrap it around the base of the ponytail. Pin the section in place, lay your baby hairs and ta-da! You’re Rihanna.
